The challenge for week 10 was 'What makes you YOU?' So here is my page:
I used some collage, some of my own clip art, paint, stencils and lettering to make this page.
Week 11 was to draw, collage, or otherwise use a bird on your page. I chose to use a photgraph and paint over it. I left the log and some of the details of the bird unpainted. I then used some stamps in the background and added my words.
Thursday, March 13, 2014
Monday, March 3, 2014
Spectrum
I've started another online art class. This one is for the next 10 months and is called Spectrum. Each month we have 2-3 teachers/lessons, it's not so much about art but self discovery. The first month's theme is OPEN. Here is the piece from my first class.
What does being OPEN mean to you? For me it brought up words like recieving, listening, availability, trust, and allowing. I was recently reminded to 'release my wounds', and in doing so you allow room for more light and love to enter. This in turn facilitates your ability to give more and be open. I also like to think when you release things, they are transmuted and in turn provide fuel for beautiful things to grow. It's not only benefiting you but becomes useful for something else.
Sunday, February 16, 2014
Saturday, February 8, 2014
Serendipity
For Christmas I received an online painting class by Juliette Crane called Serendipity. It runs through Sept. 2014 so you'll likely be seeing lots of my work from this class. I'm really enjoying learning about another artist's process. It's not at all how I've approached starting a piece when I've sat down to create something. It's teaching me a lot, and I like that. Here is the first month's project.
I really like how she turned out. She's hanging in my new studio.
Here are two works in progress. I think they still need a little something.
And yesterday I did one in my art journal. I call it, "I have something to say to you".
I'm kind of snowed in here this weekend so I"ll probably get around to doing something creative tomorrow too, I hope!
Monday, February 3, 2014
January Documented Life Project pages
I've just completed the first month of The Documented Life Project. I've really enjoyed it. The people involved are really supportive and enthusiastic. Here are some of the pages I've made.
Week 2 challenge: Selfie. I had this from one of my bigger journals, I photographed it and added the finishing touches.
Week 3: use an envelope. You might not be able to tell but the brown part is an envelope.
Week 4: Write a secret message and then paint over it and highlight one word.
Week 5: Make a page with a doodle border. It's mostly just collage with some doodling.
Week 6: Find an artist that inspires you and make a page. I chose Jane LaFazio. This is my collaged version of her style.
My favorite thing about this project is that it's with me at work all day and I've enjoyed having all these creative pages joining me there. My planner is going to get fat pretty quick!
Thursday, January 2, 2014
The Documented Life Project
I'm participating in a year long challenge called The Documented Life Project. The link will take you to the face book page. A very supportive and excited group. Every week you have a challenge (prompt) to add to your journal. Most people are using a Moleskine Day Planner that they are adding pages to for their challenges. I had already made my Day Planner so I'm adding to that. The first challenge was to photograph, sketch, paint or somehow incorporate your front door. Here is my completed page:
I photographed my door and then painted the door red, cuz I like red doors and mine is white. So maybe I'll actually paint it red this year, who knows? I then used a permanent pen and drew around the door, etc. to make it look more sketched. You'll likely see many of my weekly challenges here mixed in with whatever else I've been doing.
Here is a painting I made for one of my sisters for Christmas.
I'm working on a travel journal that I'm going to gift a friend. Should be done in a couple days. Check back!
I photographed my door and then painted the door red, cuz I like red doors and mine is white. So maybe I'll actually paint it red this year, who knows? I then used a permanent pen and drew around the door, etc. to make it look more sketched. You'll likely see many of my weekly challenges here mixed in with whatever else I've been doing.
Here is a painting I made for one of my sisters for Christmas.
Sunday, December 29, 2013
Polka Dot Socks and Jammie Day
Hi, I've declared it Polka Dot Socks and Jammie Day! Hope you can participate with me. I did get up and take a shower but decided that I probably wasn't going anywhere, so get comfy.
So what's a gal to do in her comfy jammies all day? Well, yesterday I started preparing a quilt to be quilted. This is no ordinary quilt. This quilt was found by a dear friend, in her Mother's house, after her Mother passed away. She was looking through her things and found an antique quilt top, completely hand pieced, made out of flour sacks, clothing, and sheets. She wondered if I'd be interested in quilting it. I've always wanted to finish an old quilt top so I immediately said Yes! It was in fairly good condition considering the age. At the time she didn't know who had made it but has been asking relatives and I think she knows more about it now. It had been used and possibly even washed so the edges were frayed and the fabric faded but no major stains and only a few small holes. So I set out to layer the backing, the batting, and the quilt top on my living room floor, when it soon became apparent that this quilt top was not going to lay flat. No sir. The technology has changed quite a bit in the quilting world in recent years. These old quilt tops were made out of necessity not for show. I struggled with how to get the job done without ruining the quilt or not feeling like I'd done it justice. I decided that if I made some adjustments in several places I could get it to lay flatter. Nothing I would do would ever make it totally smooth out flat but I did my best and eventually got it to a place I could live with it. I decided on a simple grid pattern for the quilting. There would be some puckers but this wasn't a perfect quilt to begin with so as I was pinning it I started connecting to the ancestors who had made it and reminding myself of all the love and work that went into this amazing quilt. At one point I'm sure they were laughing at me, giggling that that was why they never quilted it. But here I was, determined to get 'er done! So yes there are some puckers and tucks but overall it turned out beautiful. I finished the quilting and now I will try to square it up. Here is a picture of it in process. The small pieced squares are a bow tie pattern mixed with plain squares and strips of other fabric I'm guessing was sheets.
Some of the fabrics I really loved. There are a lot of polka dots:).
I'm off all week so I should be posting more of my crafty good times in the days to come. Thanks for stopping by!
Saturday, December 14, 2013
2014 Day Planner
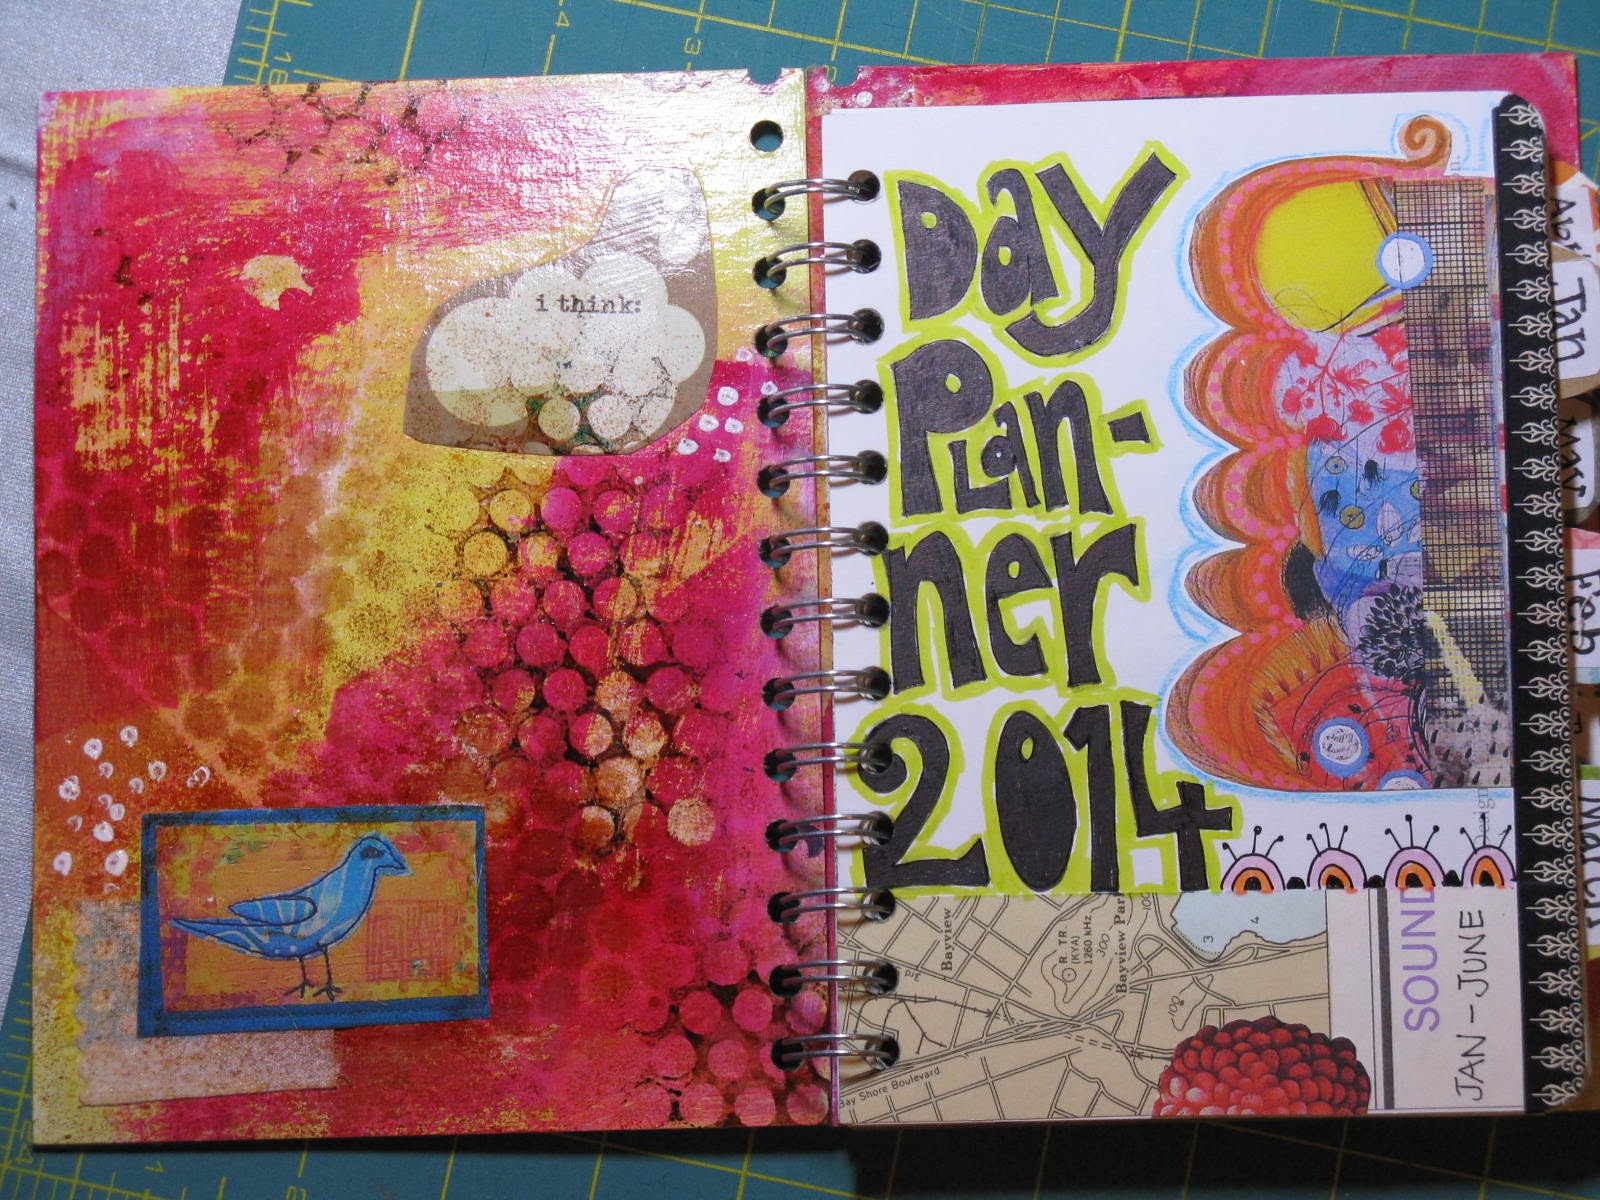
In 2013 I decided to try and find ways to make my everyday life more creative, colorful and fun. So I made my own Day Planner out of a small Smash Book. If held about six months and the size worked out well but I wanted to have more say in what papers I used, etc. So for my Birthday I got a Cinch binder system so I could make my own spiral bound day planners. The video below is the outcome of doing it all from scratch. I chose to have only six months at a time to keep the size manageable. I carry my Day Planner with me in my purse and I use it for scheduling and for all my to do lists at my job. Having my creative Day Planner makes writting in it more fun and adds cheer to my day. Hope you enjoy! Also, if you want to check out The Documented Life Project on Facebook I'm going to be participating in that group. Sounds like fun!
2014 Day Planner (video link)
I'd love to hear how you add creativity into your everyday 'to do's'.
2014 Day Planner (video link)
Saturday, August 17, 2013
It's been awhile...
Hello everyone, I've been busy as I'm sure you have too. I have been doing crafty stuff, just haven't posted in awhile. Here are some pictures of what I've been up to.
I had a lot of fun making this page. I felt like I was really trusting the process and not knowing what it would turn out like. Always good when you like how it turns out!
Here's a page in progress. I think that this girl actually looks like me. Kinda cool!
This is a watercolor girl that I was afraid to color because I really liked the pencil version. I am happy with how she turned out though. Her face was done with Prisma Colored Pencils first.
I made this journal from an old book. I took out the pages and revamped the cover. Then I added my own paper (resume paper) and put beads on the spine. Fun! This will be a writing journal.
I've got more pictures a brewin'. You'll have to check back later for more!
I had a lot of fun making this page. I felt like I was really trusting the process and not knowing what it would turn out like. Always good when you like how it turns out!
Here's a page in progress. I think that this girl actually looks like me. Kinda cool!
This is a watercolor girl that I was afraid to color because I really liked the pencil version. I am happy with how she turned out though. Her face was done with Prisma Colored Pencils first.
Back side
I made this journal from an old book. I took out the pages and revamped the cover. Then I added my own paper (resume paper) and put beads on the spine. Fun! This will be a writing journal.
I've got more pictures a brewin'. You'll have to check back later for more!
Sunday, April 7, 2013
It's Spring!
Spring is here and it's time to come out of hibernation. I have been creating jounal pages, so I'll share with you what I've been working on.
I've also been making journals. Quilted covers and recycled papers...
What has spring inspired you to do?
I've also been making journals. Quilted covers and recycled papers...
What has spring inspired you to do?
Saturday, November 24, 2012
Stuff I've made recently
I have been making backgrounds lately with the intention of putting inspirational quotes or mantras on them. Here is one I made for my sister:
And here is a painting I did for a friend. Collage papers with acrylic paint and original drawings.
What are you working on?
And here is a painting I did for a friend. Collage papers with acrylic paint and original drawings.
What are you working on?
Monday, October 15, 2012
New creating space
I haven't posted in awhile and admittedly I haven't been doing as much art or journaling lately. But, I have revamped my studio space and now I'm back in action! Here are some pictures of my new digs:
The area with the square stool is my painting area, and the office chair is where my sewing machine goes. I've already been sewing and painting since it's completion. All components are from IKEA. I'll try to post some of the projects I've been working on soon. What have you been doing to feed your creative spirit?
Sunday, June 24, 2012
Yes, another journal
Ok, so I'm on a roll. When I get into something, I get into it. I finished this one Friday night and I've already worked on some pages. The cover is made of a recycled photo album I got at goodwill.
Front
Sorry it's a little unfocused. Edges are duct tape.
Back
And here are the pages I've been working on...
Subscribe to:
Posts (Atom)